
Manual.ly Logo

Vitavia Athena 7000 Bruksanvisning

0,0 · 0 Betyg

PDF-manual · 56 Sidor

Svenska

M: QW-35-FL
sida

/ 56

Loading...
9de2b5480c9cdf600cc14f62897b00bb6a2c page 8
8 036.01.1409
7b. SIDE GLAZING
Press glazing seal (7382) into the top groove
in each (7381) and cut to t both ends.
If glazing with 4mm glass, press glazing seal
(6090) onto the aluminium proles (7b.2) and
cut to length. Note - On all horizontal glazing
guides it is recommended to use smaller
lengths of the seal (6090) in the middle of
each eld. This will allow condense water
which collects inside the house to escape.
Note - With Polycarbonate the glazing rubber
is not required.
Through the positioning of the (7050) bolt
head in the different guides in the glazing
capping‘s, it is possible to glaze the green-
house with 4mm,10mm or 16mm panes (7b.2).
Prepare bolts (7050) in each glazing capping
as shown (7b.3).
For 10mm glazing prepare 1 spacer (7407), in
the middle / top of each pane A (7b.4).
Position each glazing pane A into the frame
and connect the vertical capping‘s (7372),
(7373) or (7374) loosely with nuts (7053).
Lift pane A 15mm and connect capping‘s
(7381) loosely under the pane.
Note - The bolts (7050) used to hold the
diagonal braces in sections 1, 2 and 3 should
be replaced at this point (7b.8).
For 10mm glazing prepare 4 spacers (7409)
onto each (7321) and (7322) (2 spacers for
each pane E and F) (7b.5) (7b.6).
Position panes E and F.
Connect capping‘s (7377) or (7378) and then
(7375) / (7379) or (7376) / (7380) loosely.
Tighten all nuts. Please do not over tighten.
Note - The vertical capping‘s can be best as-
sembled when the bottom bolt is rst inserted
into the hole, then the middle and nally the
top bolt. Ensure that the capping remains in
contact with the sill bar.
8. FINAL STEPS
Insert eave plastic (7370) and (7371) into both
ends of the eave bar (7324 - 7327) (8.1).
Note - It can help to pull the eave bar at the
top edge, carefully away from the house so
that the opening for the plastic becomes lar-
ger.
Insert cropped head bolt (1412) into the bolt
channel at the bottom of corner bar (7310) and
connect parts (1405) and (1409) with alumini-
um nut (1002) on both sides (8.3). Fit elbow
(1402) onto the bottom of down pipe (1415)
(8.6) and then connect this to the eave plastic
(7370) or (7371) (8.11). Fit the down pipe
clamp (1403) around the down pipe and con-
nect to (1409) (8.4). Insert screw (1006) to x
the down pipe in place (8.5).
Slide the roof vent into the correct section from
one end of the house (8.7). Attach the roof
vent xer (7369) using the prepared holes and
self-drilling screw (7349) on both sides of the
roof vent (8.8) (8.9).
Assemble door track (7359) into the door ope-
ning. Connect to (7321), (7322) or (7324 -
7327) by inserting bolts (7052) into the bolt
channel on the outside of these bars and con-
nect with nuts (7053) (8.10).
Include at both ends of door track bar (7359)
bolt (7052) from outside and nut (3002) inside
the door guide to prevent the door from sliding
out of the track (8.10) (8.11).
Position the doors by inserting the plastic door
guides (2271) into the guide in door track bar
(7359) (8.12) (8.13a) and then lower the
wheels onto the door track on bar (7351)
(8.13b). Hook the door jump clips (7350) under
the lip on (7351) and tighten the lock nuts
(7360) (8.13b).
Connect plastic nut caps (6070) by pushing
them onto all visible nuts (7053) inside the
building (8.14).
Note - It is recommended to include a bead of
neutral silicone between the ridge bar and wall
from outside (8.9b). Neutral silicone is not
provided.
FINISHING
If desired, it is possible to further seal the
greenhouse at the edges using neutral silicone.
Silicone is not included for this purpose.
Place the warning label inside the house.
Please check the tightness of all nuts and
bolts 2 weeks after completing the assembly.
A full range of greenhouse accessories, to
help you make the most of this product, is
available from your stockist. Please inform
yourself as to the possibilities.
SAFETY NOTICE
In the event of high wind conditions, close the
doors and all vents.
In the event of heavy snowfall, clear the roof of
the building or take suitable measures to sup-
port the roof. Heat the building in winter.
COMMENTS
For the complete protection of your new
green house, we advise you to include it in
your house insurance. Please take note of
possible building rules relating to the positio-
ning of greenhouses.
Please stick the included greenhouse model
label onto door bar (7352) or (7353) after
success fully assembling this product. This
information is important in the event that re-
placement parts are later required.
Please keep these assembly instructions in a
safe place, for future reference!
Our policy is one of continuous improvement
and we reserve the right to change the speci-
cations without prior notice.

Chatta med din Vitavia Athena 7000-manual med hjälp av AI

Få omedelbara AI-svar från din Vitavia Athena 7000-manual

Fråga vad som helst om Vitavia Athena 7000. Svaren kommer från denna bruksanvisning, med de sidor de bygger på.

Athena 7000 Underhallsschema

Ibland
Tvätta växthuset med mildt rengöringsmedel

Tvätta växthuset noggrant ibland med ett milt rengöringsmedel. Se till att rengöringsmedlet inte reagerar aggressivt med aluminium eller plast.

Visa i manualen (sida 6)
Regelbundet
Rengöra dörrspåren

Se till att dörrspåren rengörs regelbundet för att undvika ansamling av skräp.

Visa i manualen (sida 6)
Efter montering
Kontrollera åtdragningen av muttrar och bultar

Vänligen kontrollera åtdragningen av alla muttrar och bultar 2 veckor efter att monteringen är klar.

Visa i manualen (sida 8)
M: qwen/qwen3.8-flash

Ställ en Fråga

0/1000

Rekommenderar du Athena 7000?

Ja Nej

Vanliga frågor

A

Du behöver skruvmejslar, en gummiklack, stegar, nycklar, en kniv, en mätsticka, en vattenpass och en accuborr med justerbar vridmoment.

Är detta svar till hjälp?

A

Ja, Vitavia Athena stöder flera glastyper inklusive 4mm glas, 10mm polykarbonat och 16mm polykarbonat beroende på modellkonfiguration.

Är detta svar till hjälp?

A

Nej, grunden ingår inte. Du måste konstruera en solid bas med betong, murverk eller stenarbete själv före montering börjar.

Är detta svar till hjälp?

A

Kondens kan minskas genom att byta ut specifika delar som (7424/7425) mot (7423*) för att öka den interna ventilationen, särskilt i polykarbonatmodeller.

Är detta svar till hjälp?

A

Ja, förankring av växthuset är obligatorisk för säkerhet och stabilitet, särskilt mot vindlast och för att uppfylla kraven i försäkringar.

Är detta svar till hjälp?

M: QW-35-FL

Fördelar och Nackdelar

Fördelar

  • Hållbar aluminiumramkonstruktion säkerställer långvarig prestanda
  • Versatila glasningsalternativ stöder både glas och polykarbonatpaneler
  • Glidandörrdesign möjliggör bekväm in- och utträde
  • Takventiler ger utmärkt naturlig ventilation och temperaturkontroll
  • Detaljerade monteringsinstruktioner förenklar byggnadsprocessen
VS

Nackdelar

  • Kräver en perfekt nivå och kvadratisk grund för korrekt installation
  • Montering kräver vanligtvis två personer för säkerhet och effektivitet
  • Neutralt silikon för tätning ingår inte i paketet
  • Kondens kan uppstå med polykarbonat utan specifika ventilationsjusteringar
  • Grundmaterial levereras inte och måste skaffas separat
M: QW-35-FL

Produkt Specifikation

Glasy

Polykarbonat 10 mm (hålrumsplattor), säkerhetsglas 3 mm (enskikt)

Ram

Aluminium

Färg

Silver

Area

6,9 kvm

Funktioner

1 takfönsterr, regntunga, låsbar

Dörr

Dubbel skjutdörr

Dimensioner (LxBxH)

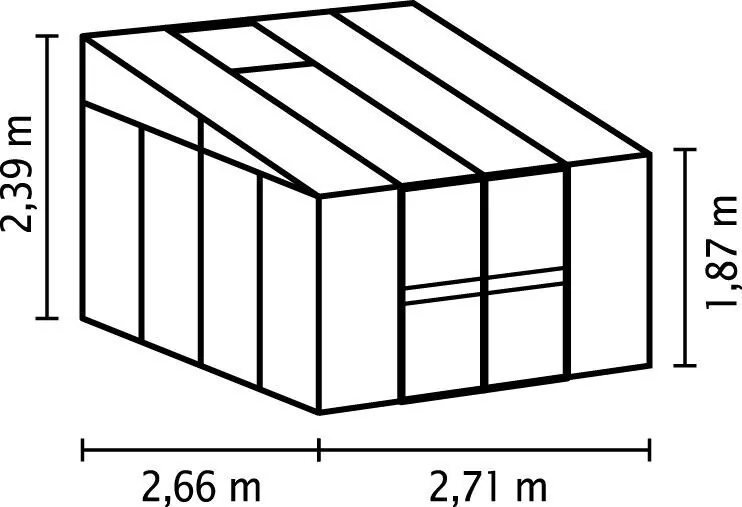
2,66x2,72x2,39 m

M: QW-35-FL

Produkt Beskrivning

Vitavia Athena 7000 ESG/HKP Växthus alu Manual

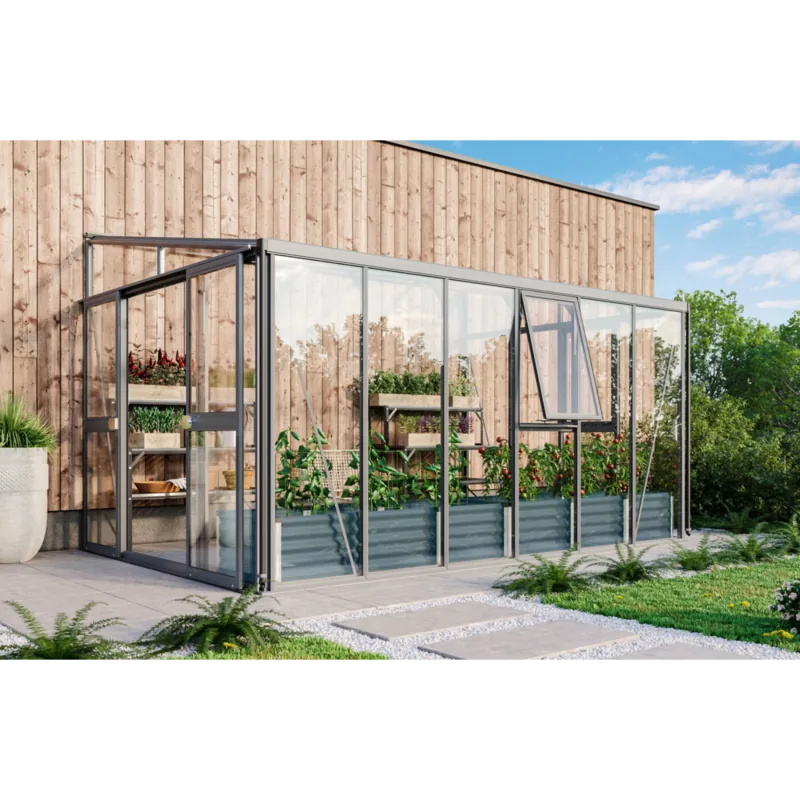
Vitavia Athena 7000 är ett robust och elegant växthus designat för allvarliga trädgårdsmän som efterfrågar hållbarhet och stil. Konstruerad av högkvalitativt aluminium erbjuder denna struktur exceptionell styrka samtidigt som den behåller en slank, modern estetik som kompletterar vilken trädgård som helst. Handboken fungerar som din omfattande guide för att låsa upp hela potentialen med denna produkt, vilket säkerställer att du kan montera den med självförtroende och precision.

Montering börjar med noggrann platsval. Det är avgörande att välja en plats som får rikligt med solljus men som är skyddad från starka vindar. En solid grund gjord av betong, tegel eller sten rekommenderas för att säkerställa stabilitet och långsiktighet. Grunden måste vara perfekt nivå och kvadrat innan du börjar placera ramkomponenterna. Säkerhet är prioriterat under byggprocessen; alltid bära skyddsutrustning såsom handskar och glasögon vid hantering av aluminiumprofiler, glas eller polykarbonatplattor.

Vitavia Athena har ett glidandörrsystem som ger enkel tillgång till dina växter. Ramen monteras sektion för sektion, börjande med frontelement och gavelsidor. Instruktionerna detaljerar hur man kopplar ihop sidoelement, installerar takmittenbjälkar och passar in takventiler för optimal klimatkontroll. Oavsett om du väljer att glassa enheten med 4mm glas eller olika tjocklekar av polykarbonat, anpassar det flexibla designen båda material sömlöst. Korrekt tätning med neutralt silikon rådgörs för att säkerställa att växthuset förblir väderhermetiskt.

Underhåll är rakt fram men nödvändigt för att hålla ditt växthus i toppskick. Regelbunden rengöring av spår och ramar förhindrar skräpuppbyggnad, vilket skulle kunna hindra smidig drift av dörrar och ventiler. Kontrollera periodiskt alla muttrar och bultar efter två veckors användning för att säkerställa att de förblir tighta. Genom att följa dessa riktlinjer som finns i Vitavia Athena 7000 ESG/HKP Växthus alu Manual kommer du att skapa en frodig miljö för dina växter i åratal framöver.

M: QW-35-FL

© Copyright 2026 Manual.ly
